This will be my first step by step painting post so we'll see how it goes. I do not claim to be a pro-painter in any way, so this is more for documentation purpose than a "how to".
A friend of mine got me on the hype train for Necromudia a little wile ago. I have assembled a starting gang with 7 members from random models and parts lying about, but have not gotten to paint them until now. Some of the models are old 40K collectors models I have not gotten to use any place else. The only original Necromudia model in my gang is "Amy", model by same name, that I got from my friend Rick on the agreement that I'd paint her and put her to use. I do so now! :D
Step 1 through 5 is all airbrush. My airbrush is entry level at best and siphon fed so not the best choice for detailed work. However it speeds up the process somewhat when applying bases. It is also worth noticing this is all done in one painting session lasting for 8 hours. Yes, you can get exhausted hands from painting, I can confirm that!
My gang, "Birds of Prey" is of the House Escher and thereby all female. Here goes!
Step 1
With the basecoat in place, I applied mechanicum standard grey to the areas of fabric and flesh, aka most of the models.
 |
| Step 1 |
Step 2
Working my way up the tones, I applied a mix of slaanesh gray and dawnstone to the areas where the brighter colours would be located.
 |
| Step 2 |
Step 3
House Escher gangs often got a lot of yellow on them. The only paint in that part of the spectrum I got at hand was yriel yellow which is a tad too bright to start working with without a yellow base. I tried a few different mixed and landed on the pupkin-ish colour for the first main colour. Works great on grey and kinda makes them look like the rebel pilots in Star Wars. <.<
 |
| Step 3 |
Step 4
Skin is applied. I use a toned down version of Kislev Flesh which I'll add a second unmodified layer of later on.
 |
| Step 4 |
Step 5
Paint it pink! The second main colour is quite a mix that it took serveral attempts to find.
 |
| Step 5 |
Step 6
Black, like a moonless night. Weapons and details are based black again after the airbrush rampage is over.
 |
| Step 6 |
Step 7
First round of detailing. How I love using purple colours so strictly forbidden to the forces of the Imperium.
 |
| Step 7 |
Step 8
Second layer to the skin, more details and general clean-up.
 |
| Step 8 |
Step 9
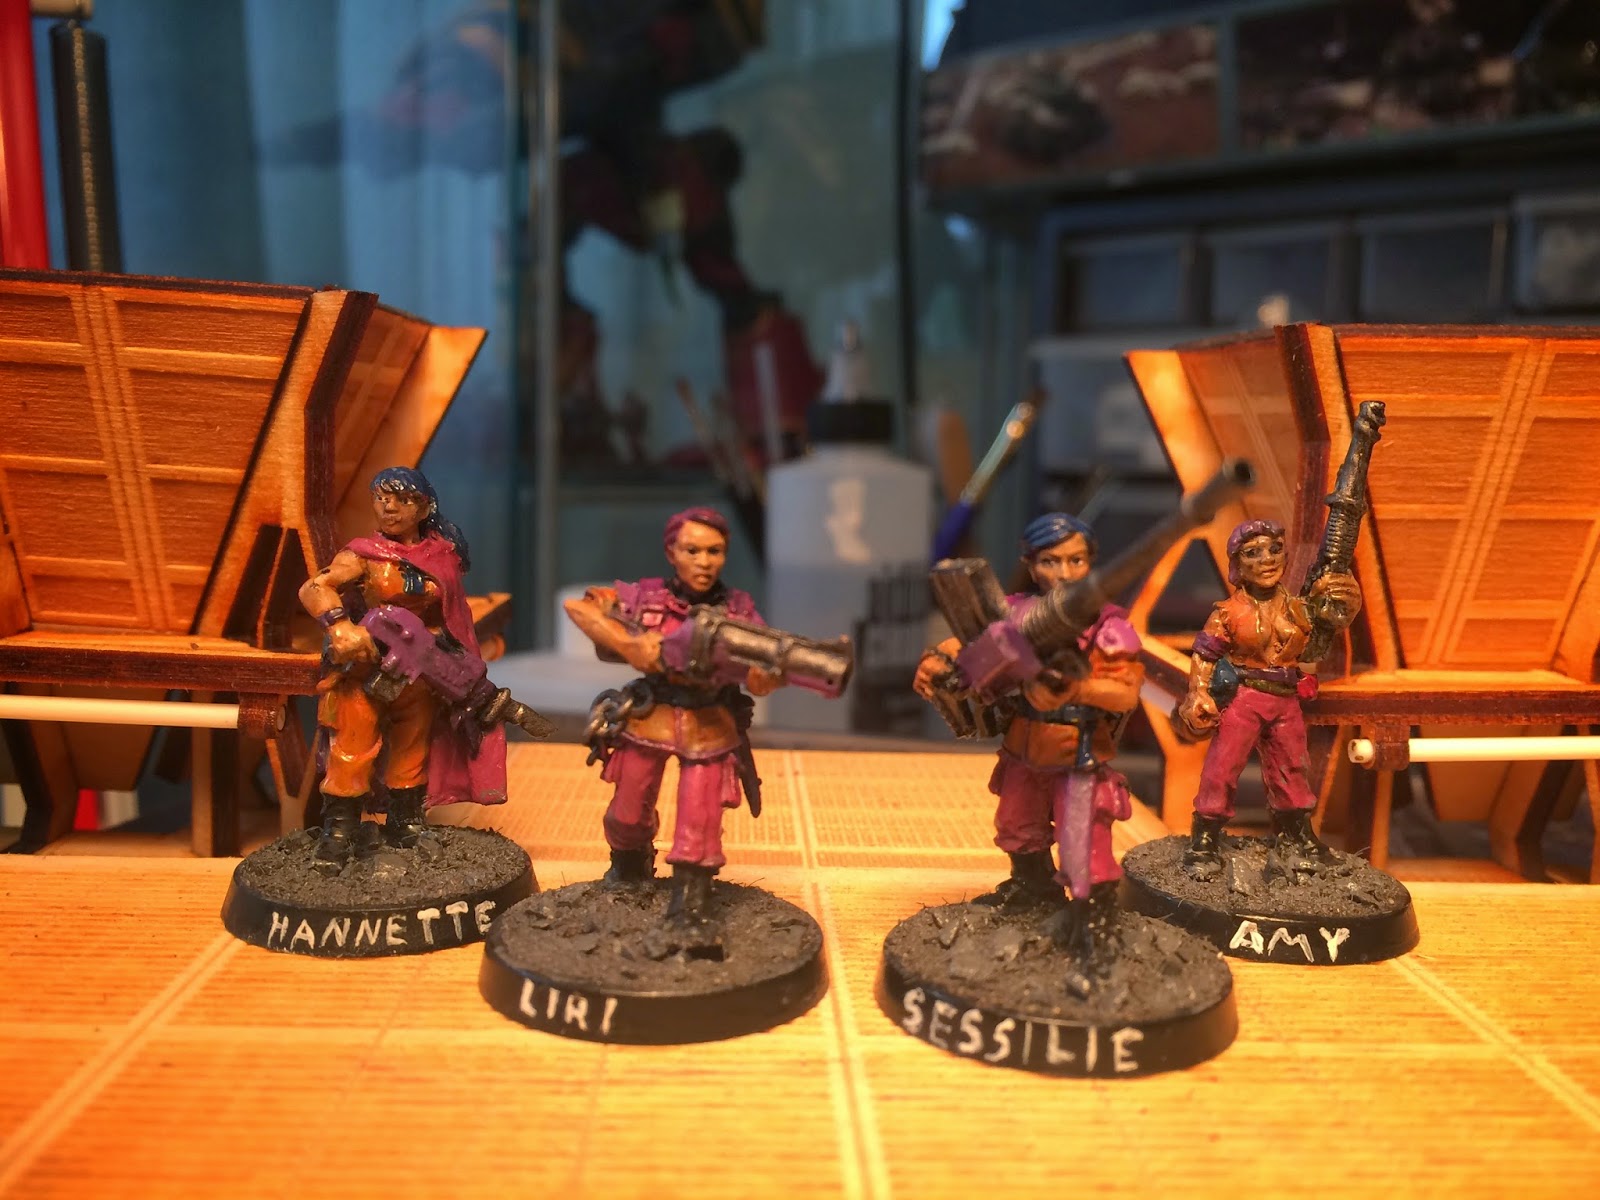
To add 10 points of grimdark to the models, remember to apply a lot of washes and shades. Also got their names on the bases! :)
 |
| Step 9 |
Step 10
Based and fixated, done and done! Even gave the eyes a try this time. Still struggling getting them right, but at least this is a step in the right direction.
 |
| Step 10 |
Edit - About the models and where they are from:
I
got one of the last chancers (Liara), one is from the Gaunts Ghosts
pack (Hannette), one is a official Necromudia model (Amy), 2 are made
from Victorian Miniature
parts (Sessilie and Liri), one is a Raging Heroes limited edition
figure (Ash) and lastly Flavia is a Bob Ridolfi sculpt at Reaper Miniatures.
Aaaaand some scenic pictures of the gang.
Onwards to infamy!


No comments:
Post a Comment